Browse all articles
Adding Employees
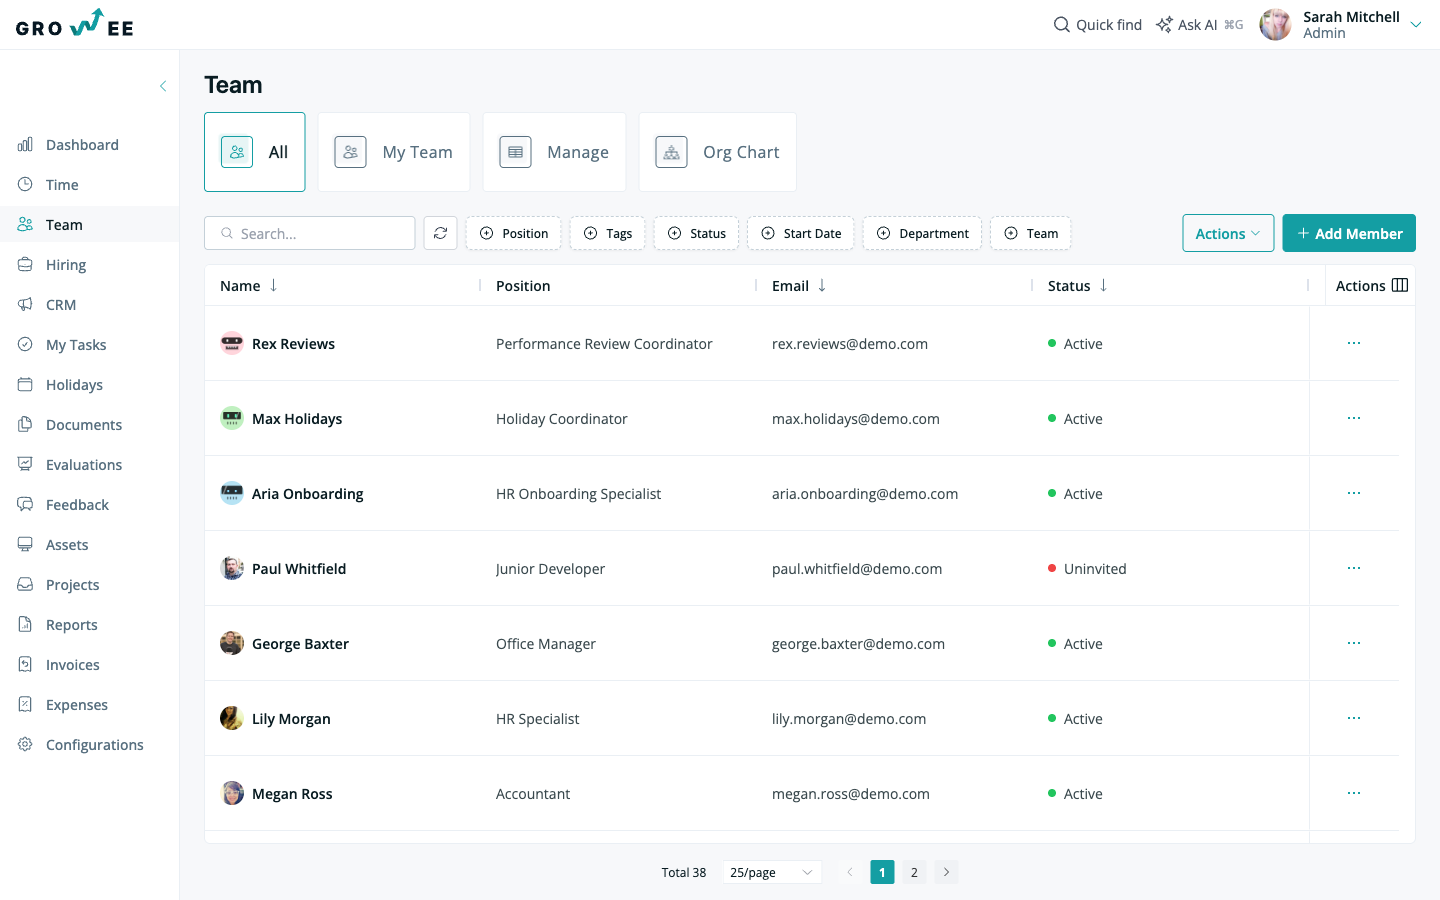
Open the Team module and click Add Member to open the Create Employee form. Choose Human under Employee Type, then fill in the required fields: First Name, Last Name, Work Email, a Role, a Contract Type, a Working Start Date, and a weekly Capacity. Select Send Invite to email the person straight away, then click Create. Admins, HR, and managers can do this.
This article covers who can add employees, the fields you fill in when creating one, and how to send an invitation to kick off onboarding. Adding an employee requires the right permissions, so this is aimed at admins, HR, and managers.
Who can add employees
Creating a team member is a permission-based action. Admins, HR, and managers can add employees. If your organization does not have a dedicated HR or manager, an admin can create members with any role. For more on what each role can do, see Roles and Permissions.
Add a team member
- Open the Team module.
- Click Add Member to open the Create Employee form.
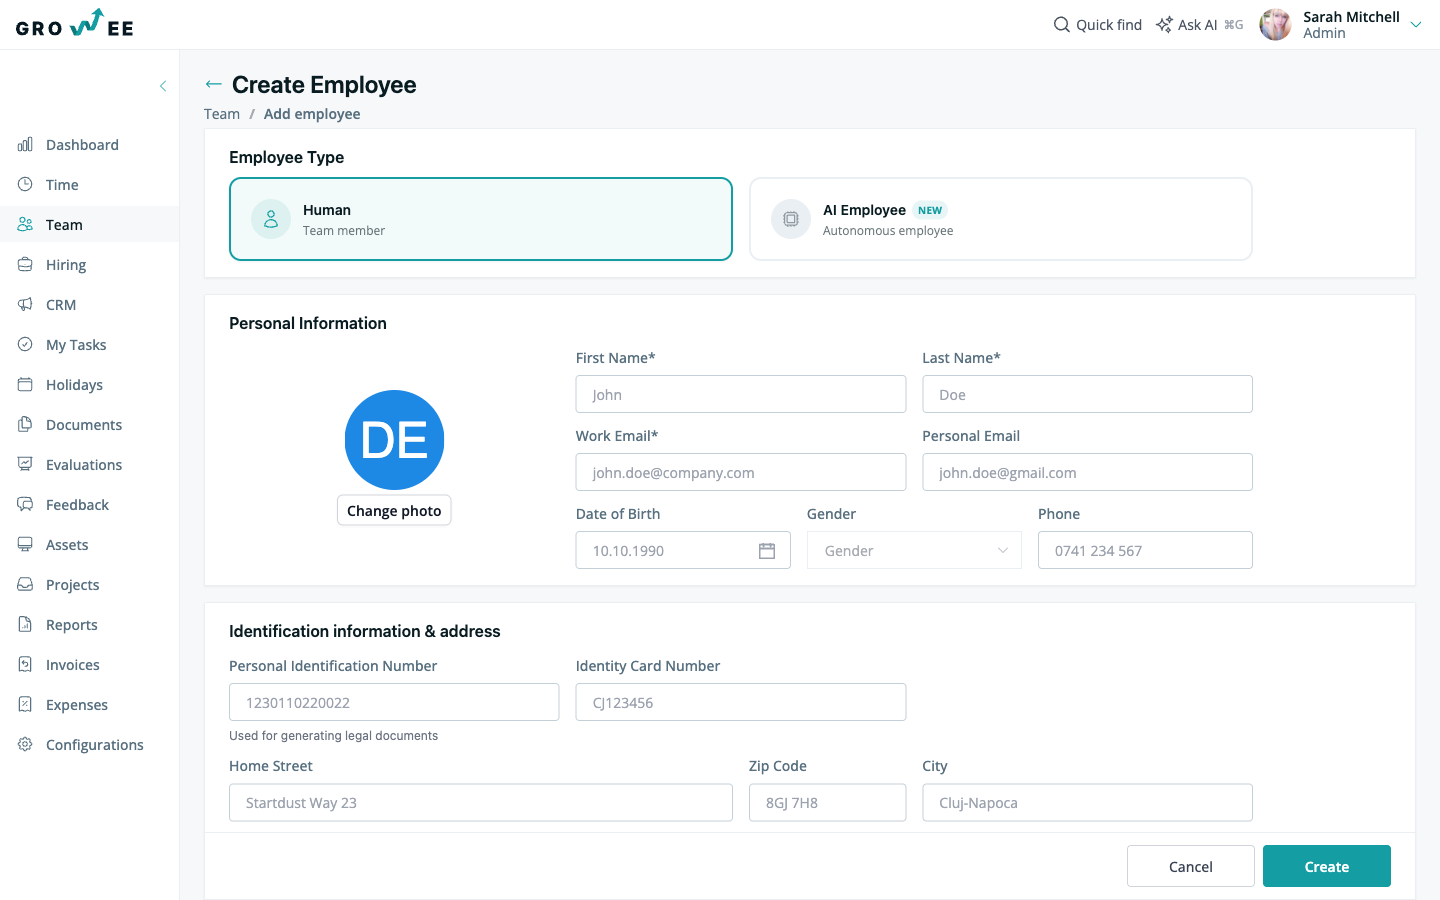
- Under Employee Type, choose Human for a team member. (AI Employee is a separate, autonomous option.)
- Fill in the required fields, marked with an asterisk. At a minimum you need First Name, Last Name, Work Email, a Role, a Contract Type, a Working Start Date, and a weekly Capacity.
- Complete any optional sections that apply. See the section breakdown below.
- To email the person an invitation right away, select the Send Invite checkbox.
- Click Create.
The new employee now appears in the Team module’s list.
What the create form covers
The form is grouped into sections. Only a handful of fields are required, so you can fill in the rest of the profile later.
- Personal Information: a profile photo plus First Name, Last Name, Work Email, and optional Personal Email, Date of Birth, Gender, and Phone.
- Identification information & address: Personal Identification Number and Identity Card Number (used for generating legal documents), the home address fields, Timezone, and free-text About and Favorite quote notes.
- Additional Information: a free-form block editor for anything else you want to record.
- Role: pick the person’s Role. Employee is the most commonly selected. The Permissions list below the dropdown shows what that role grants. See Roles and Permissions.
- Contract information: the Contract Type plus Bank, Swift Code, and IBAN used for legal documents and salary payments.
- Employment Details: Working Start Date, Position, Team, Position Code, Level, salary fields, Capacity in hours per week, Default billable rate, Internal cost rate, Work locations, and Tags. Positions and levels come from your configuration. See Departments, Positions, and Levels.
- Evaluations: set the Direct Manager and the assignees for each evaluation type.
- Custom Fields: any company-specific fields you have configured. See Custom Fields.
- Holidays: appears once you choose a contract type, showing the holiday allowances tied to that contract.
Tip: Only a few fields are required to create a member. Adding more detail over time gives the whole team better transparency. See Employee Profiles for what else you can record.
Tip: Onboarding several people at once? Use Import from Excel to add them in bulk instead of filling in the form one at a time. See Bulk Editing, Import and Export.
Send an invitation
Creating a profile does not automatically give the person access. Right after you add them, their status in the Team module shows as Uninvited.
- Find the new member in the Team list.
- Open the Actions menu for that member.
- Select Send Invite.
- Confirm in the pop-up window.
Growee then emails an invitation to the address on the profile, and you see a confirmation that the invite was sent.
What the new member does
After receiving the invitation, the new member completes their own setup:
- Opens the invitation email and follows the link.
- Creates a password.
- Accepts the invitation and finishes registration.
Once they complete these steps in order, they can log in and their status updates from Uninvited. For the full invitation workflow, including resending invites, see Inviting Your Team.
Onboarding templates
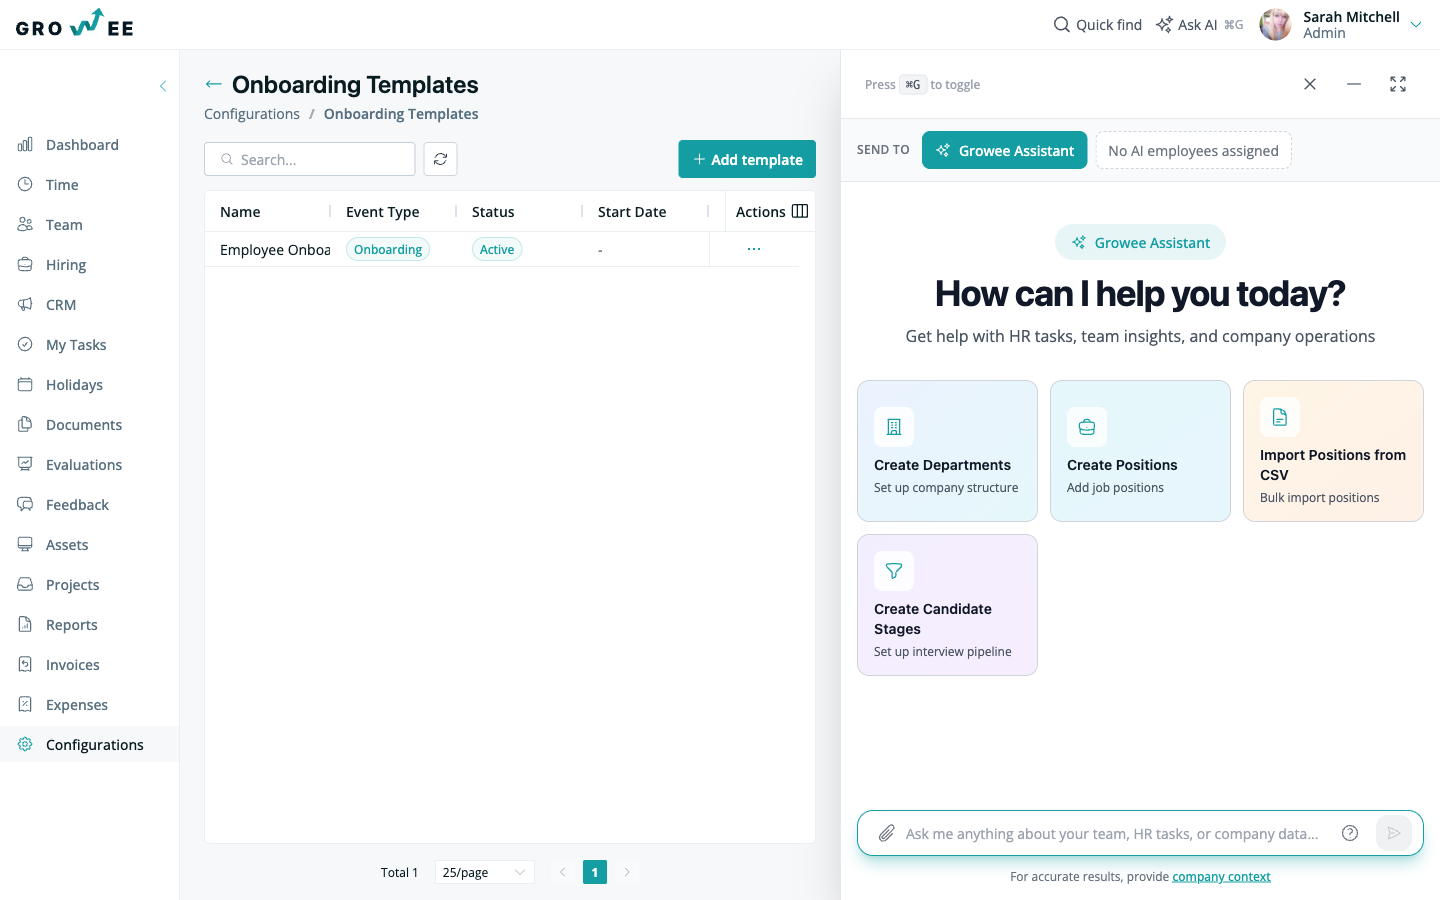
To standardize how new hires start, admins can define reusable onboarding checklists under Configurations → Onboarding Templates. A template lists the steps a new member should complete, so every hire follows the same process.
Related articles
Need more help? Contact support or email support@growee.net.