Browse all articles
Creating Projects
Open the Projects module and click Add Project. Select the client the project belongs to, since every project is associated with one, then enter a project name. Set the money side: a budget and budget type of Monthly, Yearly, or Fixed, a billing model, and a currency that defaults to EUR. Click Create Project.
Before you start
You need a client first. Every project is associated with a client, so add one before you create a project. See Managing Clients.
Create a project
- Open the Projects module.
- Click Add Project.
- Select the Client the project belongs to. If the client does not exist yet, click Add client to create one without leaving the form.
- Enter a Project name. You can also add a Website and a Description.
- Set the money side of the project (see the fields below).
- Click Create Project.
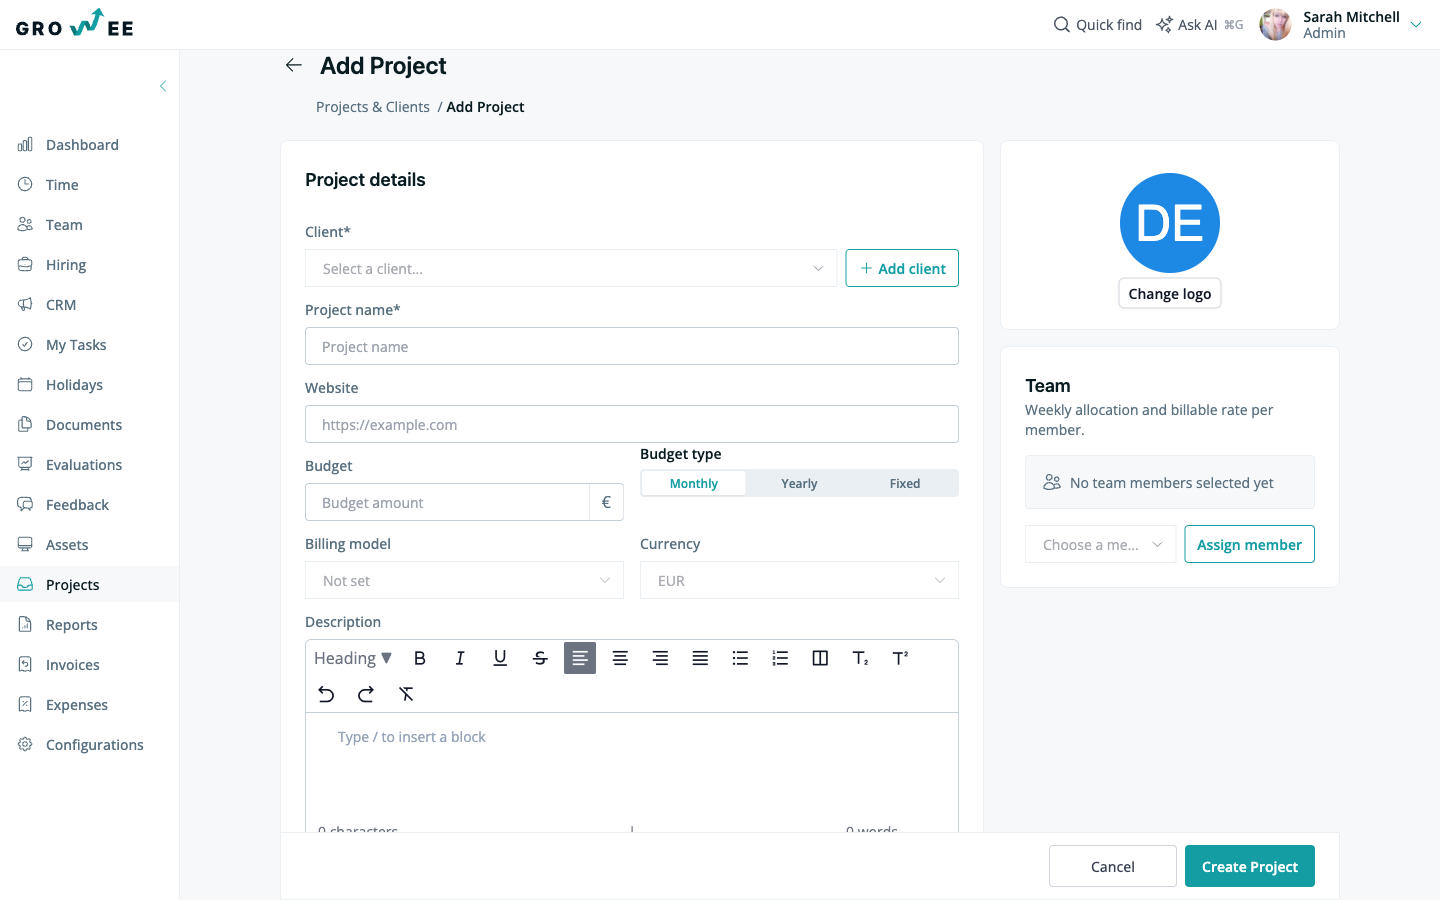
The Add Project form collects a few billing-related fields:
- Budget and Budget type: enter a budget amount and choose whether it is Monthly, Yearly, or Fixed.
- Billing model: how the project’s value is calculated. This is the setting behind the Fixed price and Time & materials labels you see later on the Projects page.
- Currency: the currency for the project’s budget and rates. It defaults to EUR.
Assign team members
Assigning employees to a project controls who can log time to it and powers your reports. For example, you can track the hours a specific employee logged on a project over the last week or month.
Use the Team panel on the right of the Add Project form to build the team while you create the project:
- Pick an employee from the Choose a member dropdown.
- Click Assign member.
- Set that member’s weekly allocation and billable rate.
You can also change the team later. Open the project, click the three-dot menu and choose Edit, then scroll to the Team section.
Note: Employees need to be on a project’s team before they can log time to it. See Logging Time.
Tasks
Tasks are the categories your team logs time against. Add them in the Tasks section of the Add Project form: type a task name and click Add task. Repeat for each category you want.
When an employee logs time, they pick the project and then a task, so tasks appear in your time reports. See Logging Time.
Billable rates and the time-to-invoice flow
Budgets and rates only pay off when logged time flows through to reports and invoices. Growee connects those steps in one chain:
- Create a client. Every project belongs to one. See Managing Clients.
- Create a project with a budget, budget type, and billing model.
- Assign members, each with a weekly allocation and an hourly billable rate.
- Members log time against the project and its tasks. See Logging Time.
- Reports show hours and value. Logged hours are valued at each member’s billable rate, so you can see effort and revenue side by side. See Detailed Reports.
- Invoices are generated from logged time. Turn the billable hours into a client invoice. See Creating Invoices.
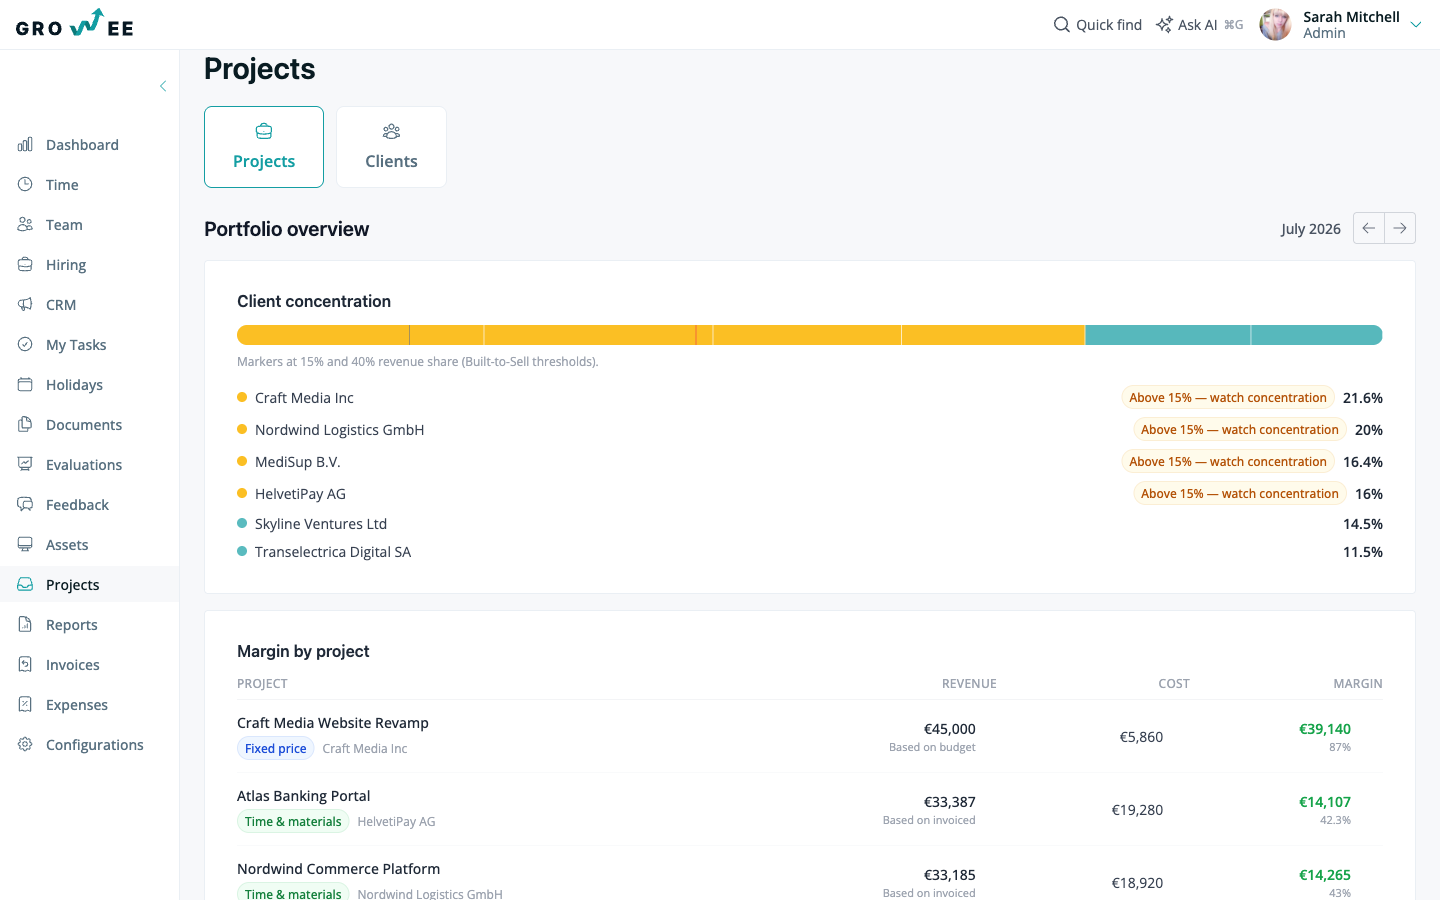
The Projects page opens on a Portfolio overview for the selected month. Two widgets summarize the health of your book of work:
- Client concentration shows each client’s share of your revenue, with markers at 15% and 40% revenue share. Clients above the 15% threshold are flagged so you can watch how dependent you are on any single one.
- Margin by project lists each project’s revenue, cost, and margin, labeled by billing model (for example Fixed price or Time & materials).
Related articles
Need more help? Contact support or email support@growee.net.