Browse all articles
Connect AI Agents via MCP
Open Configurations → Integrations, select AI Agent Integration, and copy your workspace’s MCP server URL. The same page carries a setup card for ChatGPT (Browser), Codex (Desktop and CLI), and Claude (Browser, Desktop, and CLI). With those apps you paste the URL and sign in with your Growee account; scripts and headless clients use an MCP client token from the same page instead.
This article is for anyone who wants to work with their Growee data from an AI agent over MCP (Model Context Protocol). Everything the agent does runs inside your own roles and permissions, so it can only see and change what you already can.
What you can do with MCP
Once an agent is connected, you can ask it about your Growee data or have it carry out actions for you. Because the agent inherits your permissions, it reaches the same employees, time logs, holidays, projects, and tasks you have access to in the app.
Typical requests include:
- “Show me all active employees”
- “List my pending holiday requests”
- “Request a holiday tomorrow”
- “Log 8 hours in my timesheet”
- “Get my recent timesheets”
- “Show tasks assigned to me”
Find your MCP server URL
All setup starts from one page in Growee.
- Open Configurations → Integrations.
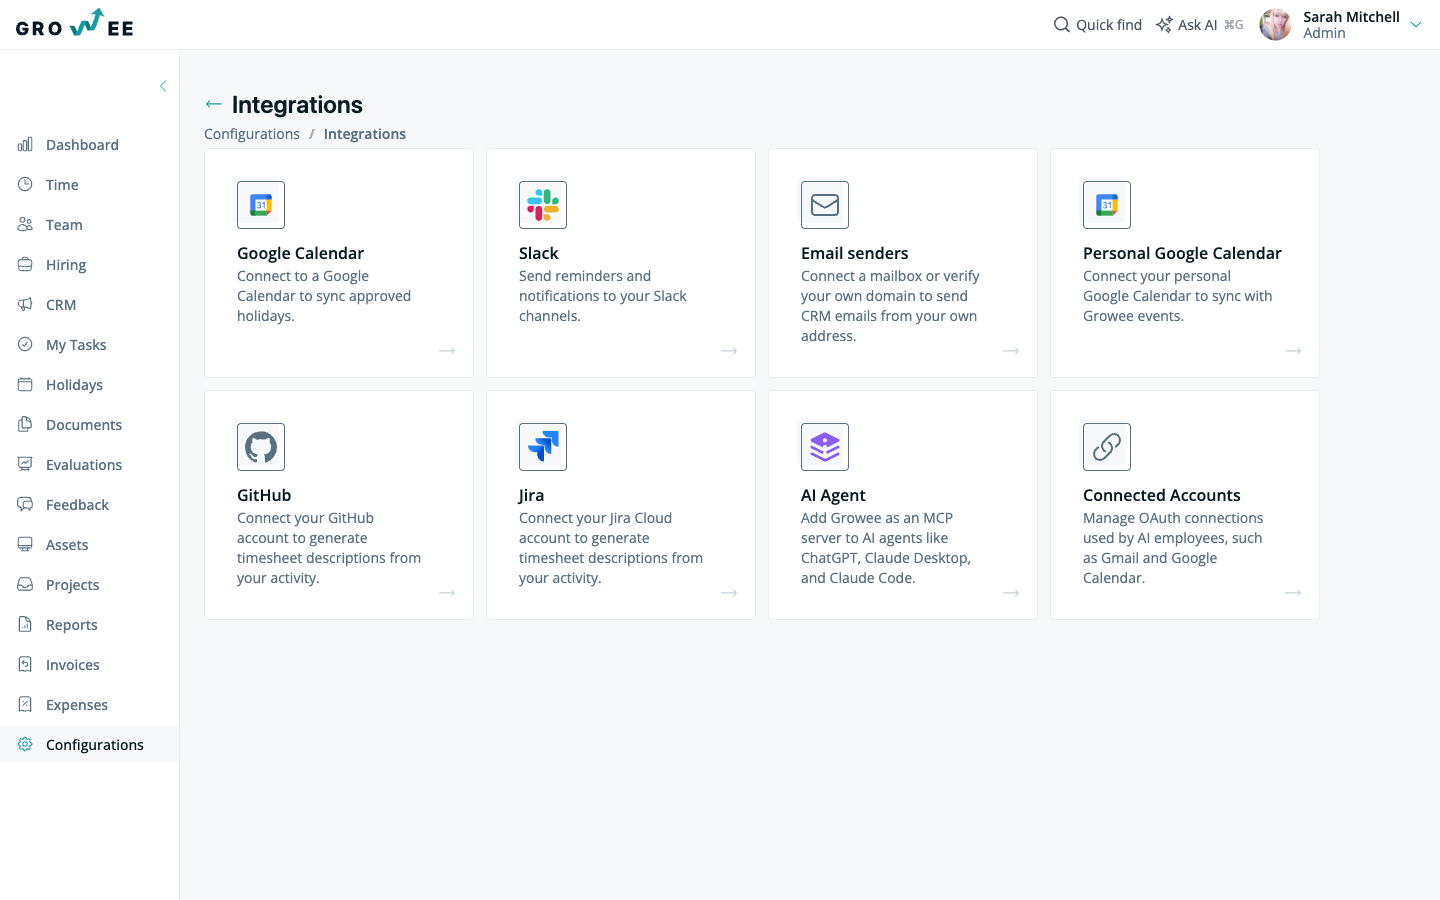
- Select AI Agent Integration.
- Copy the MCP server URL shown near the top of the page. It looks like
https://<your-company>.growee.net/mcp/restify.
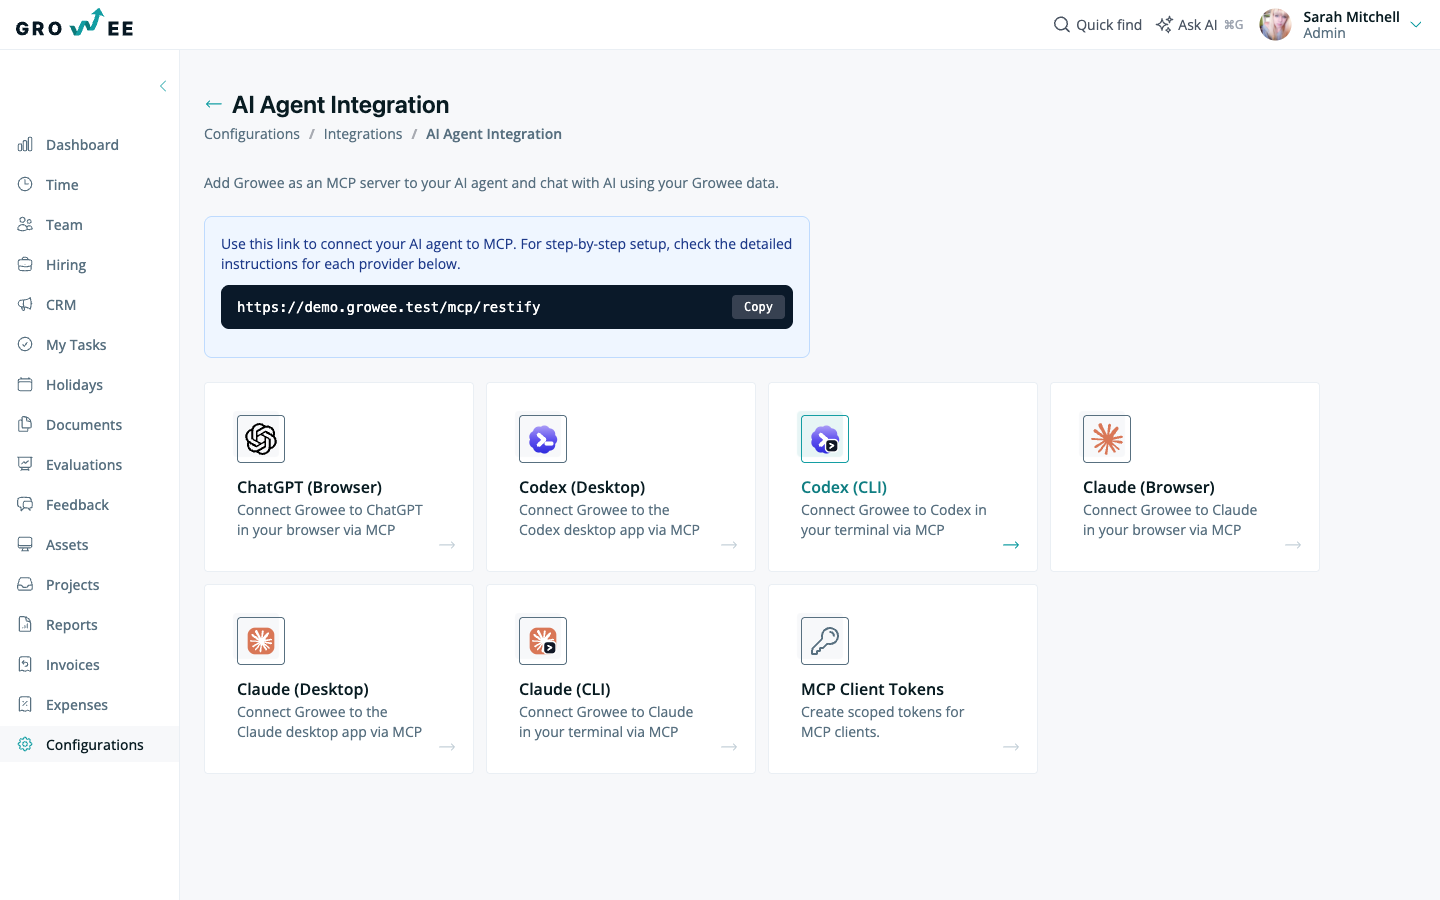
The same page has a setup card for each supported agent: ChatGPT (Browser), Codex (Desktop), Codex (CLI), Claude (Browser), Claude (Desktop), and Claude (CLI). Select a card to open step-by-step instructions for that agent, with the server URL ready to copy.
Note: Your server URL is specific to your company workspace. Use the exact value from your own AI Agent Integration page rather than copying an example.
Connect Claude in your browser
Selecting the Claude (Browser) card opens a dialog with the exact steps. In Claude:
- Go to Settings → Connectors.
- Click Add, then Add custom connector.
- Enter a name (for example, “Growee”) and paste the MCP server URL from the dialog. Leave Advanced settings empty.
- Click Save, then sign in with your Growee account to authorize the connection.
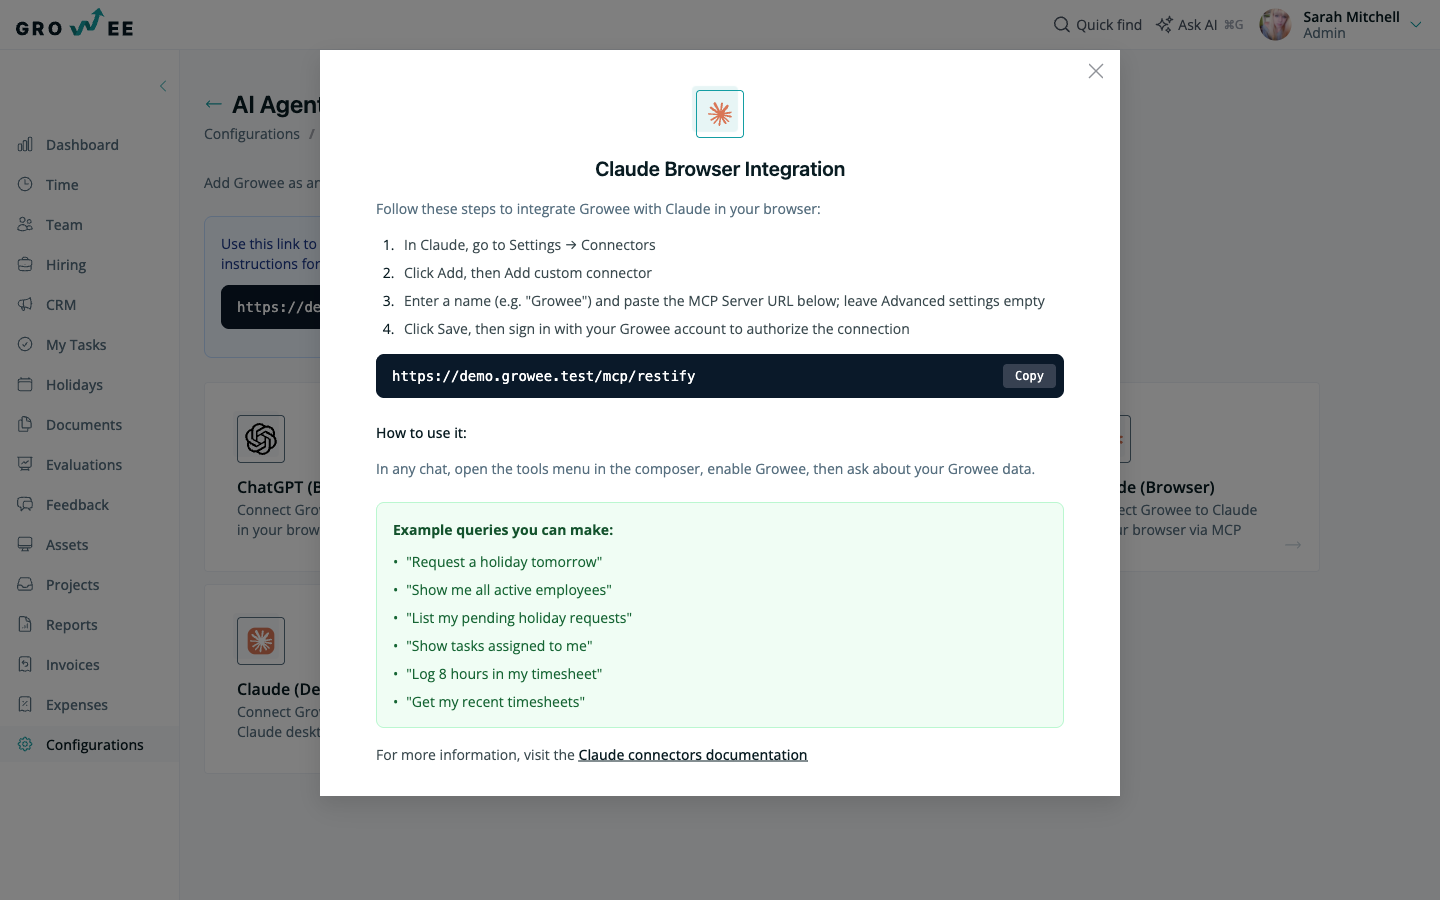
To use it, open any chat, open the tools menu in the composer, enable Growee, then ask about your Growee data. The setup dialog also links to Claude’s own connectors documentation if you need more detail.
Connect other agents
Each agent has its own card on the AI Agent Integration page, and each card opens a dialog with steps written for that client:
- ChatGPT (Browser) connects Growee to ChatGPT in your browser.
- Codex (Desktop) and Claude (Desktop) connect the desktop apps.
- Codex (CLI) and Claude (CLI) connect the agents in your terminal.
Open the card for the agent you use and follow the instructions there. In every case you paste the same MCP server URL and sign in with your Growee account.
MCP client tokens
Browser, desktop, and CLI agents sign in with your Growee account, so they act as you. For scripts, headless clients, or any tool that cannot sign in interactively, use a token instead.
On the AI Agent Integration page, select MCP Client Tokens to create scoped tokens for MCP clients. A token lets a client connect without an interactive sign-in while still respecting Growee permissions.
Permissions and security
MCP does not widen what an agent can access. Every request runs inside your existing roles and permissions, so a connected agent can only read and change the data your account already allows. To review who can do what, see Roles and permissions.
Because agents act with your access, connect only the agents you trust, and remove any connector you no longer use from the agent’s own settings.
Related articles
Need more help? Contact support or email support@growee.net.