Browse all articles
Timers and Clock In/Out
Open the Time module and click Start to begin timing a task. A clock icon shows the timer is running, and Stop pauses it, displaying the time spent so far. Click Start again to continue where you left off. When you stop, the tracked time is recorded against the project and task you selected, so it sits on the same daily and weekly timesheet as hours you enter by hand.
This article explains how to start and stop a timer, how the tracked time reaches your timesheet, and how clocking in and out works. It is for anyone who prefers to time their work live rather than fill in a timesheet manually.
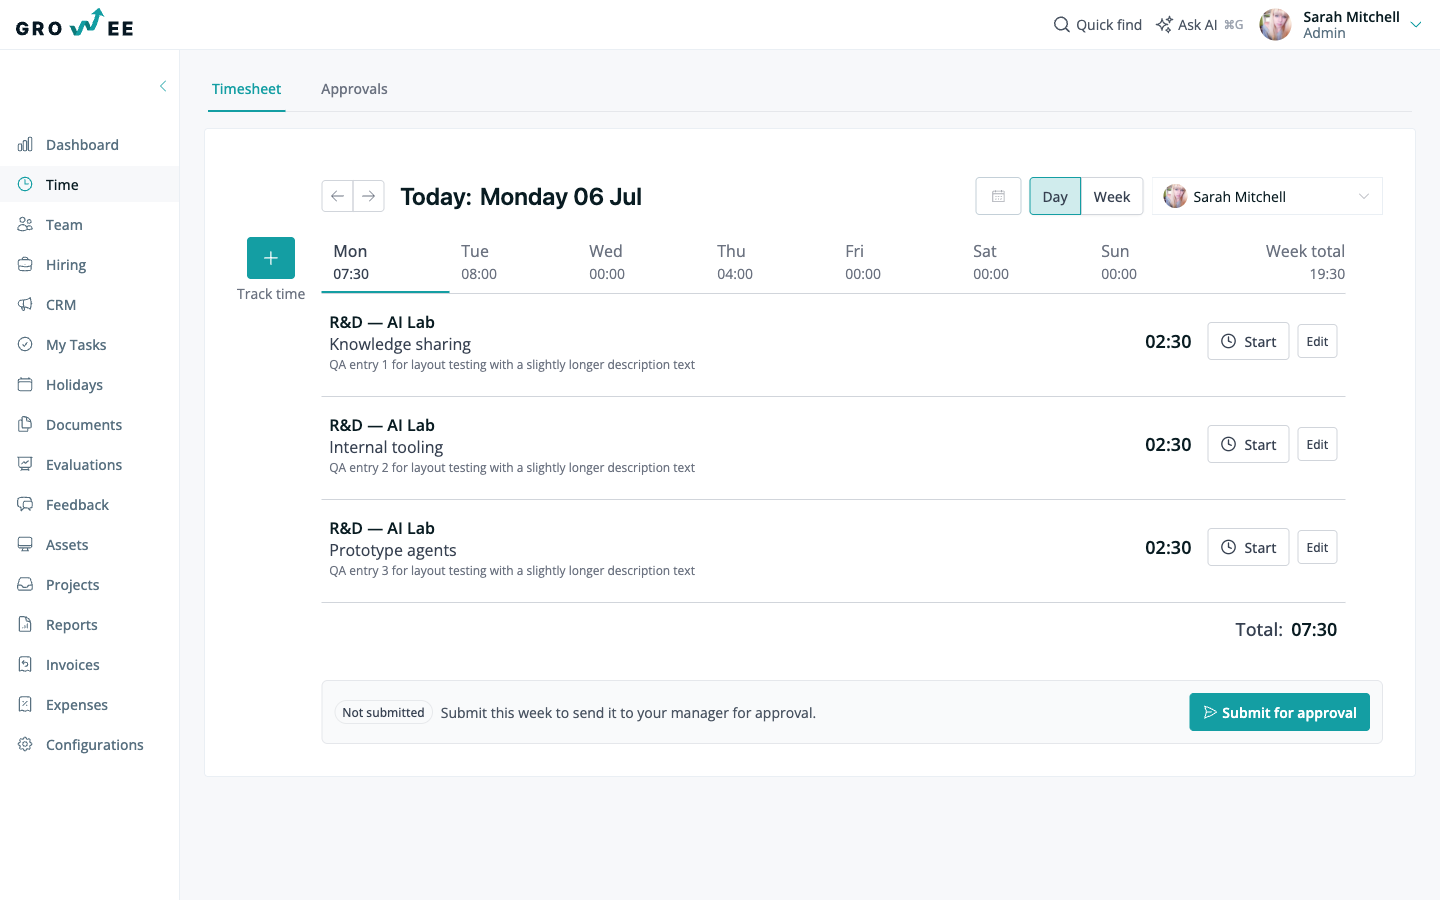
Start and stop a timer
The timer lives in the Time module and works with two buttons: Start and Stop.
- Start: Click Start to begin timing a task. The timer starts counting and a clock icon appears to show that it is running.
- Stop: Click Stop to pause the timer when the task is finished or you need a break. The Stop button stays visible and shows the time spent so far.
To pick the task back up, click Start again and the timer continues from where it left off.
How timer entries reach your timesheet
When you stop a timer, the time it tracked is recorded against the project and task you selected, so it appears alongside the entries you add by hand. This means you can mix both methods: start and stop timers in real time for some tasks, and enter hours manually for others. Either way, the time shows up on the same daily and weekly timesheet.
For manual entry and for editing saved records, see Logging Time.
Clock in and clock out
Growee also supports clocking in and out with a single click. Clock in when you start your day and clock out when you finish, and Growee captures the time between the two without any manual math.
To help nothing slips through, Growee can send gentle reminders to clock in or out, so hours do not go missing at the start or end of the day.
Related articles
Need more help? Contact support or email support@growee.net.